First off, I used photoshop CS5 in this tutorial. When I made the original puzzle portrait, I used CS3, so you should be able to use any version you like, as long as it has the displacement filter.
What you will need is the picture that you want to turn into a puzzle and then some sort of picture of a puzzle. What I did back in the day was put a puzzle together, flipped it over and then took a picture of the back of the puzzle. Then I traced out a bunch of pieces. Do not do this, it takes too long. You can easily find a free graphic of a plain white puzzle on google.
Once you get your puzzle you will want to take out all that extra white-space, I did this while using Adobe Illustrator. I did a live trace and took out all of the white in the picture. I didnt think of this till the middle of this tutorial so you might notice the puzzle lines got thinner. Anyways, here we go
Here is my image that Im using, I think it fits the mood well.
The first step in doing a Displacement Map is that you have to prepare your image.
Go to Filter>Blur>Gaussian Blur. Give your image a nice little blur, as you can see I used one about 8.4, you can go more or less if you want. After that you need to desaturate your image or turn it into black and white. Do a curves adjustment to give your image some contrast.
What this step does is setting up your map, soon you will see what Im talking about.
After you are done with this, save it in a place you will remember, and save it as a PSD.
Ok, after this, what you need to do is import your puzzle. For this I made three different layers. One set for the face, one for the hands and one for the shoulders. I also made them different sizes too.
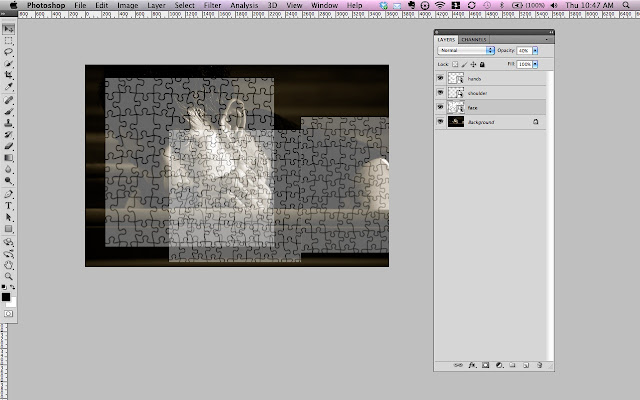
Ok after you have placed them where they need to, go ahead and turn off the layers of the ones you dont plan on mapping first. For me I started mapping the face piece. Go into Filter>Distort>Displace.
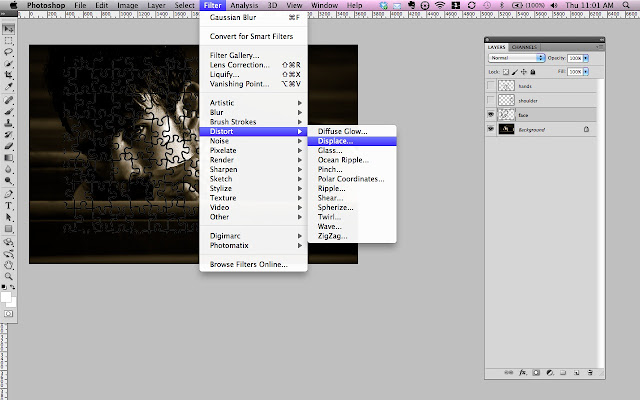
This is where it gets real tricky.
You will have to play with these numbers a bit till you get the mapping you want. I stayed around the 15-25 range on each of pieces I did. You should be pretty safe with this setup however. After you hit ok, a dialogue window will popup asking for a picture, make sure you select that black and white image that is all blurred and nasty looking. This image is going to be the indicator of the highs and lows of your mapping.
So now you have something that will probably look like this, its nothing fancy, not yet anyway. It also might be a bit distorted too. Dont worry, we will fix this. Make sure you have your puzzle layers set to Multiply blending mode.
You are going to need to clean this up now. Go through and delete the areas in the hair and sticking in the hand and whatnot.
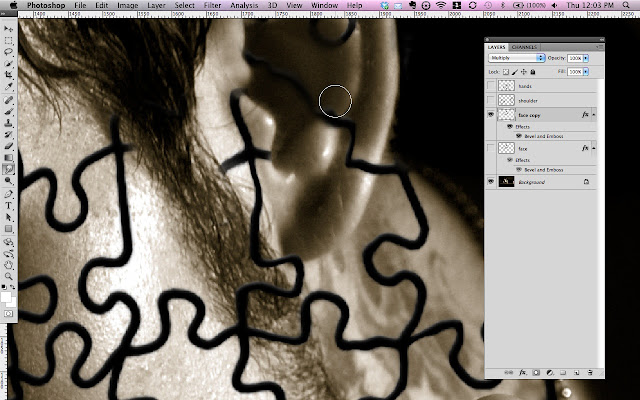
This is also the time where you will go in and use the liquify filter. Its easy to find, go to Filter>Liquify. This is a whole new monster as well. There is a little feature (at least on CS5) where you can see your background image. You will zoom in and use a small brush to move small pieces in places. This seems like a lot of work, and it is unless you have done this a whole lot. But hey, its worth it in the end.
Also worth noting is that you might have to apply a soft erase brush to take away some of the areas just a little bit to add a fade. You can also blur out some of the area where the picture is already out of focus, like the neck piece in this picture. I dont think I did the best job on my example as I was in a hurry.
When you are done, you might have something similar to this...
Now lets get to the hands...
After erasing all the extra areas that didnt need to be used and did the Displacement Filter again, this is what I have. Its ugly and has a lot of curves because of the way the hand is shaped. So again, we go into our liquify filter and start playing around again.
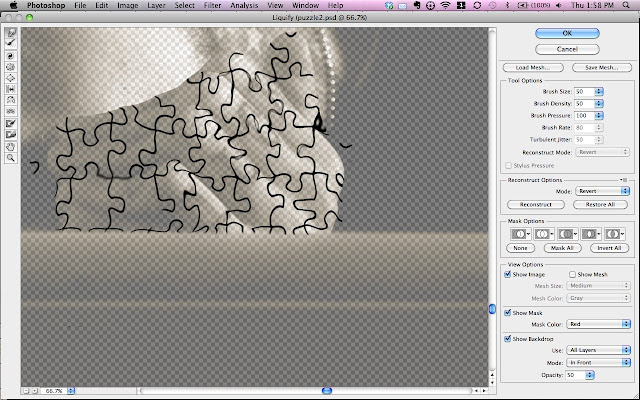
Here is where I was talking about using the liquify filter and have the background in there to better help us. The box is located at the bottom right btw. You will need to play with this a whole lot in order to get the desired looks.
this is about what you want it to look like in the end.
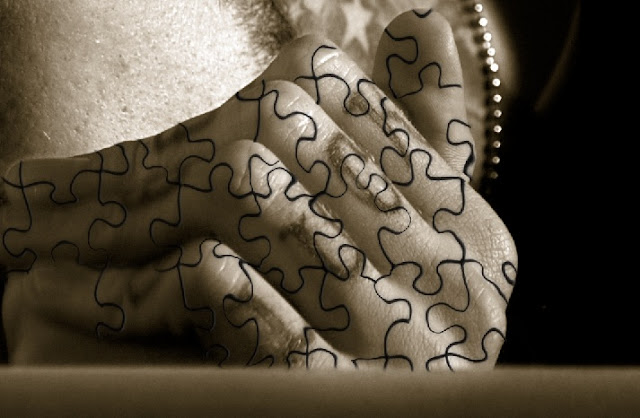
Again, I did a little blurring of the pieces and a little erasing in shadow areas.
After this, you want to do the shoulders, at this point its pretty easy. So go ahead and do that.
Now this is the last part you will have to do. In each of the puzzle layers, do a bevel emboss on the pieces. Play around with the effect till you get the desired look. Also remember to set your blending modes to Multiply.
Now you will have something that looks similar to this in the end.
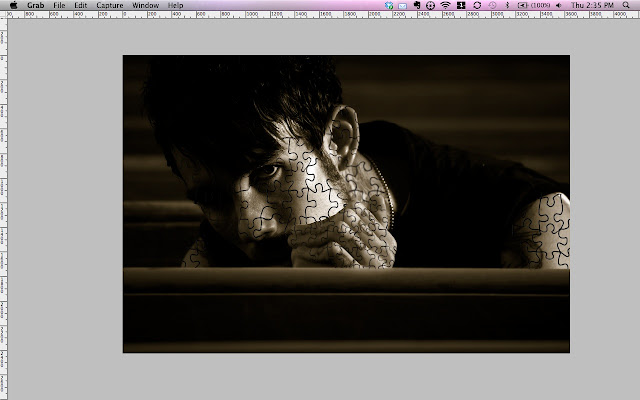
Let me know if you have any questions.


.jpg)
.jpg)


