So I decided to jump on the bandwagon and start doing video tutorials. They are so much easier to make compared to taking screen shots. Here you can see how its done as I do it and I do a better job of explaining it as well.
Showing posts with label photoshop. Show all posts
Showing posts with label photoshop. Show all posts
Sunday, February 13, 2011

Friday, August 20, 2010
How to: Beautifying tips in Photoshop
Everywhere you go, you see the beautiful people filling the covers of magazines. If you dont know by now, a lot of the work is done in Photoshop. But what are some of the techniques used to make your model look perfect?
Here is a typical head-shot session. Im going to skip the color correction and save that for another time. But for now, lets focus on the retouching of the model.


Here is a typical head-shot session. Im going to skip the color correction and save that for another time. But for now, lets focus on the retouching of the model.

Ok, before I do ANYTHING else, I always duplicate the beginning layer. I use a Mac so its J
Really simple but very necessary incase things go bad, you always have it to revert to. Its also good practice to continue doing this throughout the edit.

It isnt until you zoom into your subject do you start to see the flaws, dont worry, every single person has them. Everybody has some form of acne or wrinkles so lets figure out how to get rid of them.
Above you can see that I have pointed to the Spot Healing Brush. This is a tool I use constantly. all you do is make the brush size to fit your need (not too big of course) and just start clicking away at acne or sunspots.
Sometimes though, you cant fix it with the spot-healing brush. This is where you have to use the actual Clone Stamp tool. You can get it by just typing "s". How it works is that you pick a spot to clone from by holding "alt/option" (on a mac that is) and then clicking your target area. Make sure you click on an area that you want to clone and then start brushing over the "bad area" I recommend using an opacity of about 30%, its just much easier that way to get finer details. The clone stamp takes a lot of practice, but it always gets the job done.

Ok, after a lot of clicking to get rid of sunspots and other unwanted features, we can see that we actually did a lot to improve our picture. Yet there is still more to do here. We want to really smooth out the subject's face.
This is where I show a really cool trick called the History Brush. I never started using it until a couple of months ago, I never knew what it was and thought it was a worthless tool. I was very wrong, its a very convenient tool and it comes in handy in situations like this.
Ok, how do we smooth out the face?

Go to Filter > Blur > Gaussian Blur. When the window pops up, set it to about 10px.
Now your picture is blurry beyond recognition. This is where the brush comes to life.

In your History box you will see the Gaussian Blur at the bottom. Go ahead and click on the little box to the left of it and you will see a little icon take its place.
After this, make sure you backup a step, click on the last action to take place right before you did the Gaussian Blur. Now you will notice that the picture is no longer blurry.


Now all you have to do is click on the History Brush icon or just press "Y".
Using a lower opacity and soft edge brush, about 30% or lower is best for opacity, you want to start brusing over places like the forehead and other areas that have a lot of detail. What this is doing is smoothing out the face by applying the Gaussian Blur in small amounts. Make sure to leave some of the areas alone, like the eyes of course.

So after you are happy with this, you might want to lighten up a few areas by using the Dodge or Burn brushes. But if not, you ought to be done. Go head and compare the finished result with the very beginning picture. You will notice a huge difference.
Friday, July 30, 2010
Puzzle Portrait Tutorial
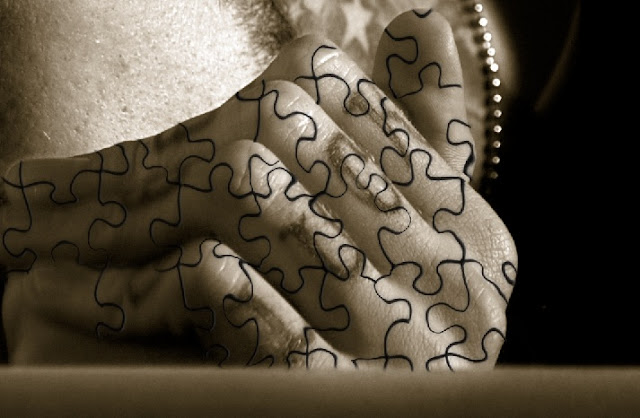
I have a lot of people asking my how I made my puzzle portrait, so I thought I would give a tutorial. Its pretty in-depth. So here you go.
First off, I used photoshop CS5 in this tutorial. When I made the original puzzle portrait, I used CS3, so you should be able to use any version you like, as long as it has the displacement filter.
What you will need is the picture that you want to turn into a puzzle and then some sort of picture of a puzzle. What I did back in the day was put a puzzle together, flipped it over and then took a picture of the back of the puzzle. Then I traced out a bunch of pieces. Do not do this, it takes too long. You can easily find a free graphic of a plain white puzzle on google.
Once you get your puzzle you will want to take out all that extra white-space, I did this while using Adobe Illustrator. I did a live trace and took out all of the white in the picture. I didnt think of this till the middle of this tutorial so you might notice the puzzle lines got thinner. Anyways, here we go






First off, I used photoshop CS5 in this tutorial. When I made the original puzzle portrait, I used CS3, so you should be able to use any version you like, as long as it has the displacement filter.
What you will need is the picture that you want to turn into a puzzle and then some sort of picture of a puzzle. What I did back in the day was put a puzzle together, flipped it over and then took a picture of the back of the puzzle. Then I traced out a bunch of pieces. Do not do this, it takes too long. You can easily find a free graphic of a plain white puzzle on google.
Once you get your puzzle you will want to take out all that extra white-space, I did this while using Adobe Illustrator. I did a live trace and took out all of the white in the picture. I didnt think of this till the middle of this tutorial so you might notice the puzzle lines got thinner. Anyways, here we go

Here is my image that Im using, I think it fits the mood well.
The first step in doing a Displacement Map is that you have to prepare your image.

Go to Filter>Blur>Gaussian Blur. Give your image a nice little blur, as you can see I used one about 8.4, you can go more or less if you want. After that you need to desaturate your image or turn it into black and white. Do a curves adjustment to give your image some contrast.
What this step does is setting up your map, soon you will see what Im talking about.
After you are done with this, save it in a place you will remember, and save it as a PSD.
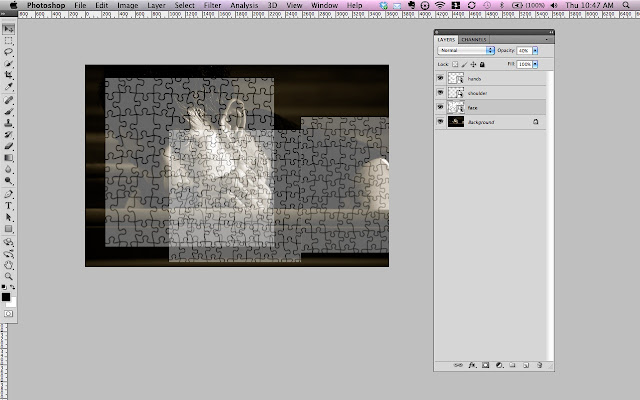
Ok, after this, what you need to do is import your puzzle. For this I made three different layers. One set for the face, one for the hands and one for the shoulders. I also made them different sizes too.

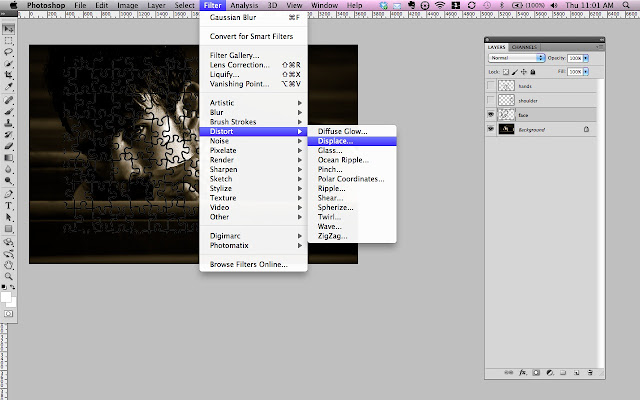
Ok after you have placed them where they need to, go ahead and turn off the layers of the ones you dont plan on mapping first. For me I started mapping the face piece. Go into Filter>Distort>Displace.

This is where it gets real tricky.

You will have to play with these numbers a bit till you get the mapping you want. I stayed around the 15-25 range on each of pieces I did. You should be pretty safe with this setup however. After you hit ok, a dialogue window will popup asking for a picture, make sure you select that black and white image that is all blurred and nasty looking. This image is going to be the indicator of the highs and lows of your mapping.
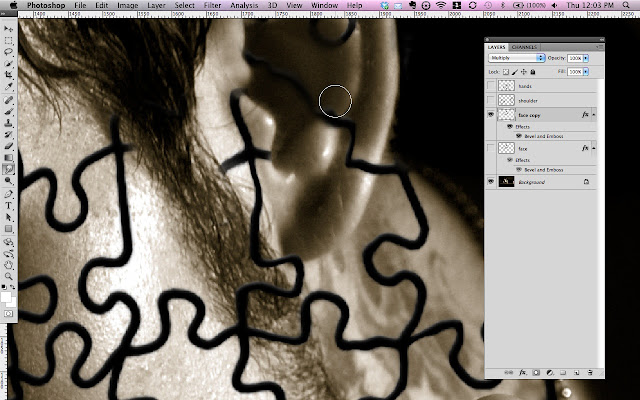
So now you have something that will probably look like this, its nothing fancy, not yet anyway. It also might be a bit distorted too. Dont worry, we will fix this. Make sure you have your puzzle layers set to Multiply blending mode.

You are going to need to clean this up now. Go through and delete the areas in the hair and sticking in the hand and whatnot.

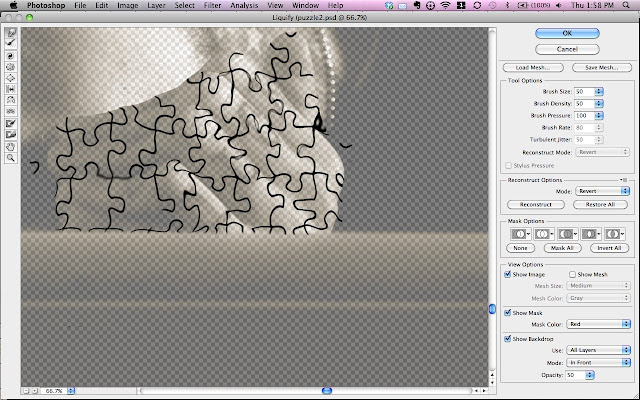
This is also the time where you will go in and use the liquify filter. Its easy to find, go to Filter>Liquify. This is a whole new monster as well. There is a little feature (at least on CS5) where you can see your background image. You will zoom in and use a small brush to move small pieces in places. This seems like a lot of work, and it is unless you have done this a whole lot. But hey, its worth it in the end.
Also worth noting is that you might have to apply a soft erase brush to take away some of the areas just a little bit to add a fade. You can also blur out some of the area where the picture is already out of focus, like the neck piece in this picture. I dont think I did the best job on my example as I was in a hurry.
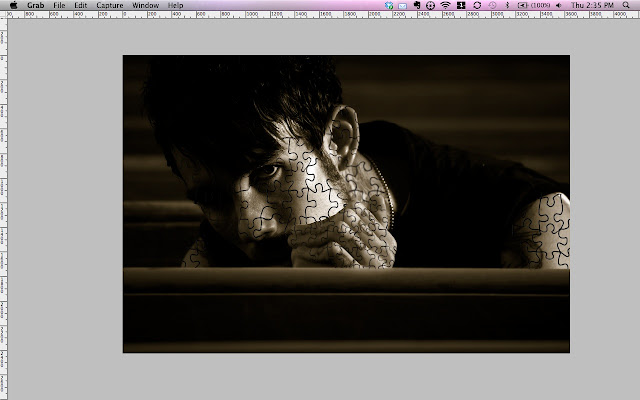
When you are done, you might have something similar to this...

Now lets get to the hands...

After erasing all the extra areas that didnt need to be used and did the Displacement Filter again, this is what I have. Its ugly and has a lot of curves because of the way the hand is shaped. So again, we go into our liquify filter and start playing around again.

Here is where I was talking about using the liquify filter and have the background in there to better help us. The box is located at the bottom right btw. You will need to play with this a whole lot in order to get the desired looks.
this is about what you want it to look like in the end.

Again, I did a little blurring of the pieces and a little erasing in shadow areas.
After this, you want to do the shoulders, at this point its pretty easy. So go ahead and do that.
Now this is the last part you will have to do. In each of the puzzle layers, do a bevel emboss on the pieces. Play around with the effect till you get the desired look. Also remember to set your blending modes to Multiply.
Now you will have something that looks similar to this in the end.

Let me know if you have any questions.
Subscribe to:
Posts (Atom)